This guide walks you through the initial setup steps from the time you purchase a RuneScape: Dragonwilds dedicated server until you can join it. It takes only a few minutes. The "Owner ID" setting in particular is an essential step—without it, no one can join—so be sure to complete it first.
v1.0 (Created June 2026)BESTNET LLCReading time: approx. 7 minutes
Revision History
v1.0
June 2026 — Initial version
Post-Purchase Flow and Game Panel Login
Once payment is complete, your server is automatically constructed and provided in a ready-to-use state. When construction is finished, we will send you a notification email containing the game panel URL, login credentials, and server connection information (world name, etc.).First, log in to the game panel and verify your server status.
Log in to the game panel using the URL and credentials provided in the notification email.
Open your RuneScape: Dragonwilds server from the server list.
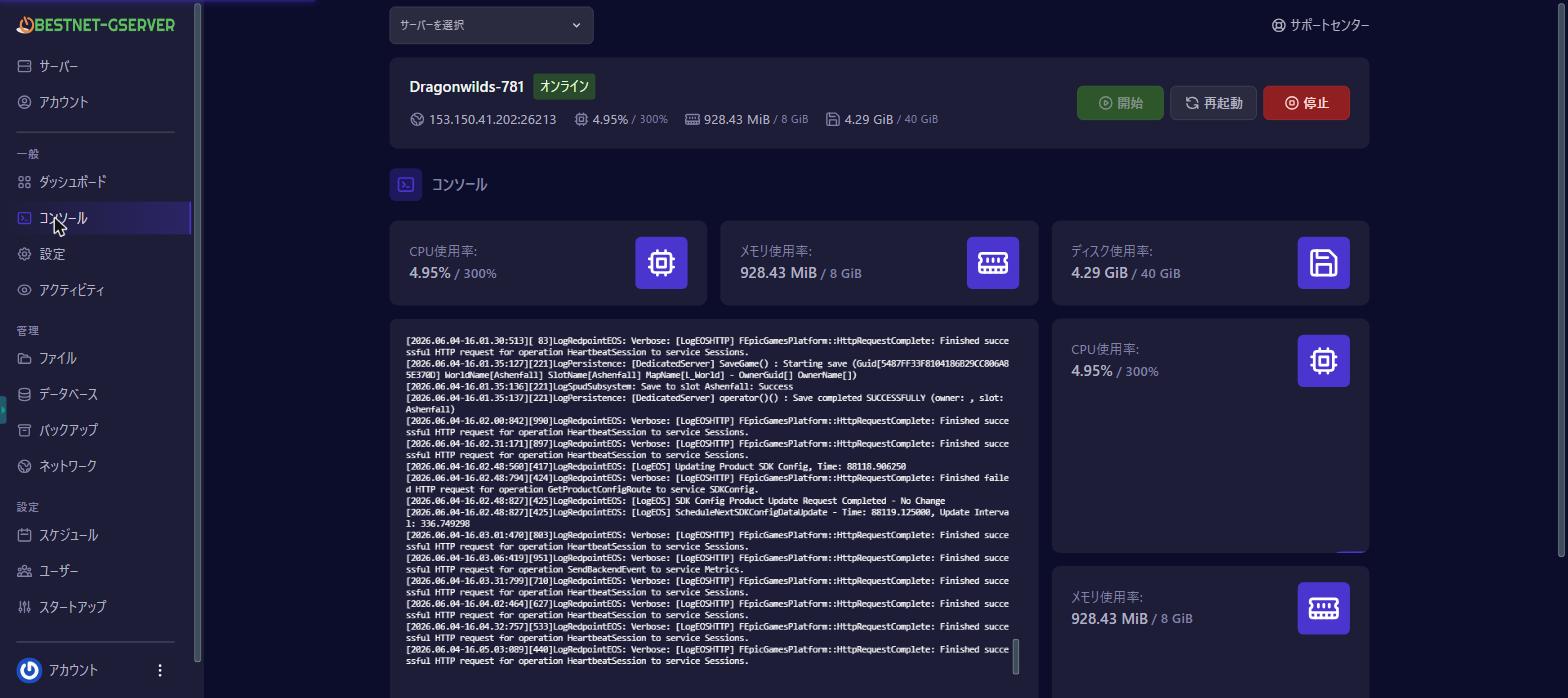
In the Console tab, verify that the server status shows "Running" (green).
▲ Verify in the Console tab that the status shows "Running"The server will automatically start after construction, but it is not yet accessible to anyone. In Steps 1–3 below, you will set the Owner ID to enable access.
While the Owner ID is unset, the server will remain inaccessible to everyone, including you, even if it shows "Running" (neither server browser joins nor direct IP connections will succeed). This is a game requirement. Be sure to set it first.
The Owner ID uses the in-game Player ID of the server owner (normally yourself). You can find your Player ID by launching the game and following these steps:
Launch RuneScape: Dragonwilds.
Open the Settings menu.
Scroll to the bottom of the Settings screen to find "My Player ID."
Use the copy button to copy your Player ID.
Your Player ID is a 32-character alphanumeric (hexadecimal) string, similar to 1a2b3c4d5e6f7a8b9c0d1e2f3a4b5c6d.
The Player ID is a unique identifier per account. Check and copy it from the in-game settings of whoever you want to be the server owner (contract holder/administrator). Saving it to your phone or notes will make it easier to paste in the next step.
Step 2: Set Owner ID in the Game Panel
Paste the copied Player ID into the game panel as your server's "Owner ID."
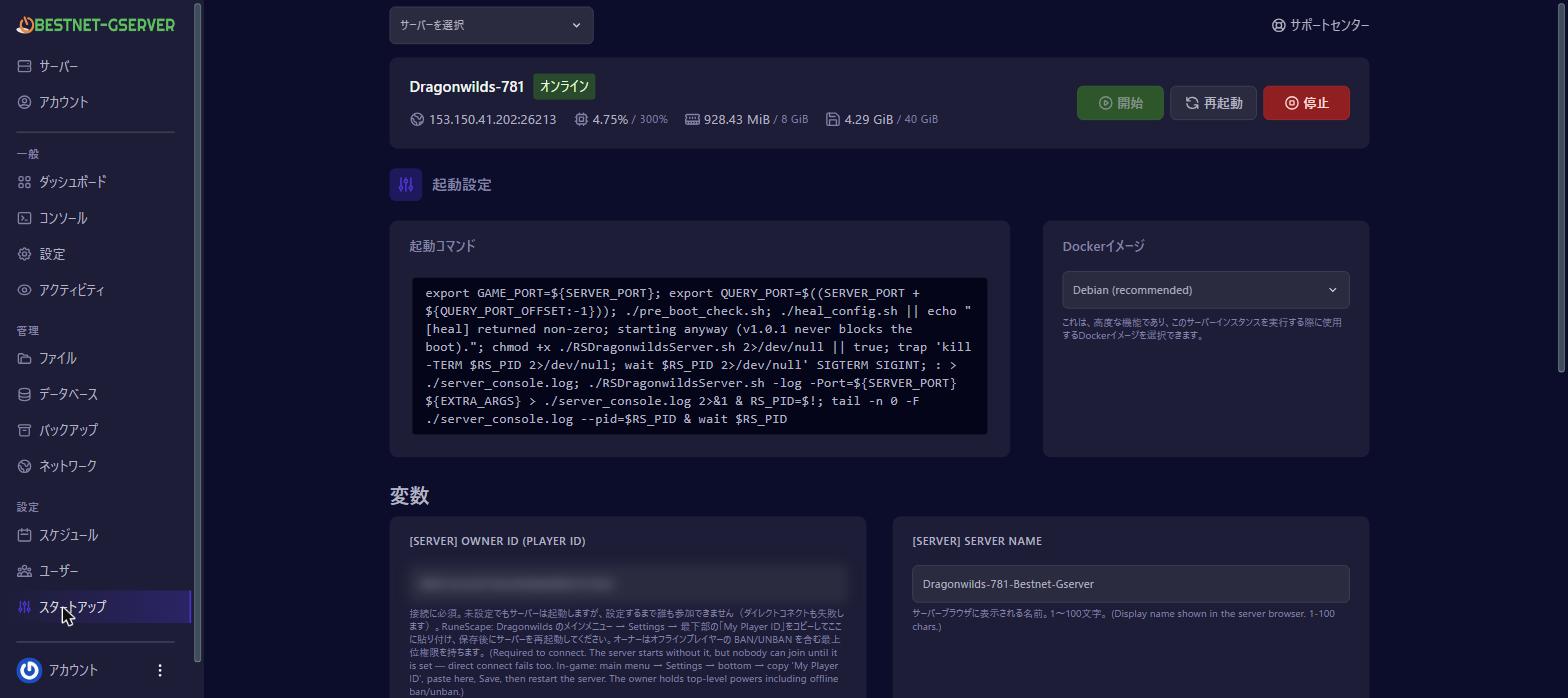
Open your server in the game panel and click the Startup tab in the left menu.
Find the Owner ID input field and paste the Player ID you copied in Step 1, then save.
Open the Console tab and click Restart to reboot the server.
After restart, your server will start with the Owner ID set and be ready to accept players.
Always restart the server after entering the Owner ID. The setting will not take effect until you restart.
During login, the owner is verified by matching the Player ID, not by any owner name displayed in-game. Even if the owner name field appears blank in the panel, as long as the Owner ID is correctly set, you can join normally.
▲ Paste your Player ID into the "Owner ID" field in the Startup tab
Step 3: Join Your Server
Once Owner ID setup is complete, you can join your server using either of the two methods below. The same methods apply when inviting friends—simply share the world name (for public browser) or IP:port number (for direct connection). If the world is private, also share the world password. Both methods require the Owner ID to be set beforehand.
Method A: Find by World Name in the Public Browser
Open the Worlds screen from the in-game menu.
Select the PUBLIC tab at the top.
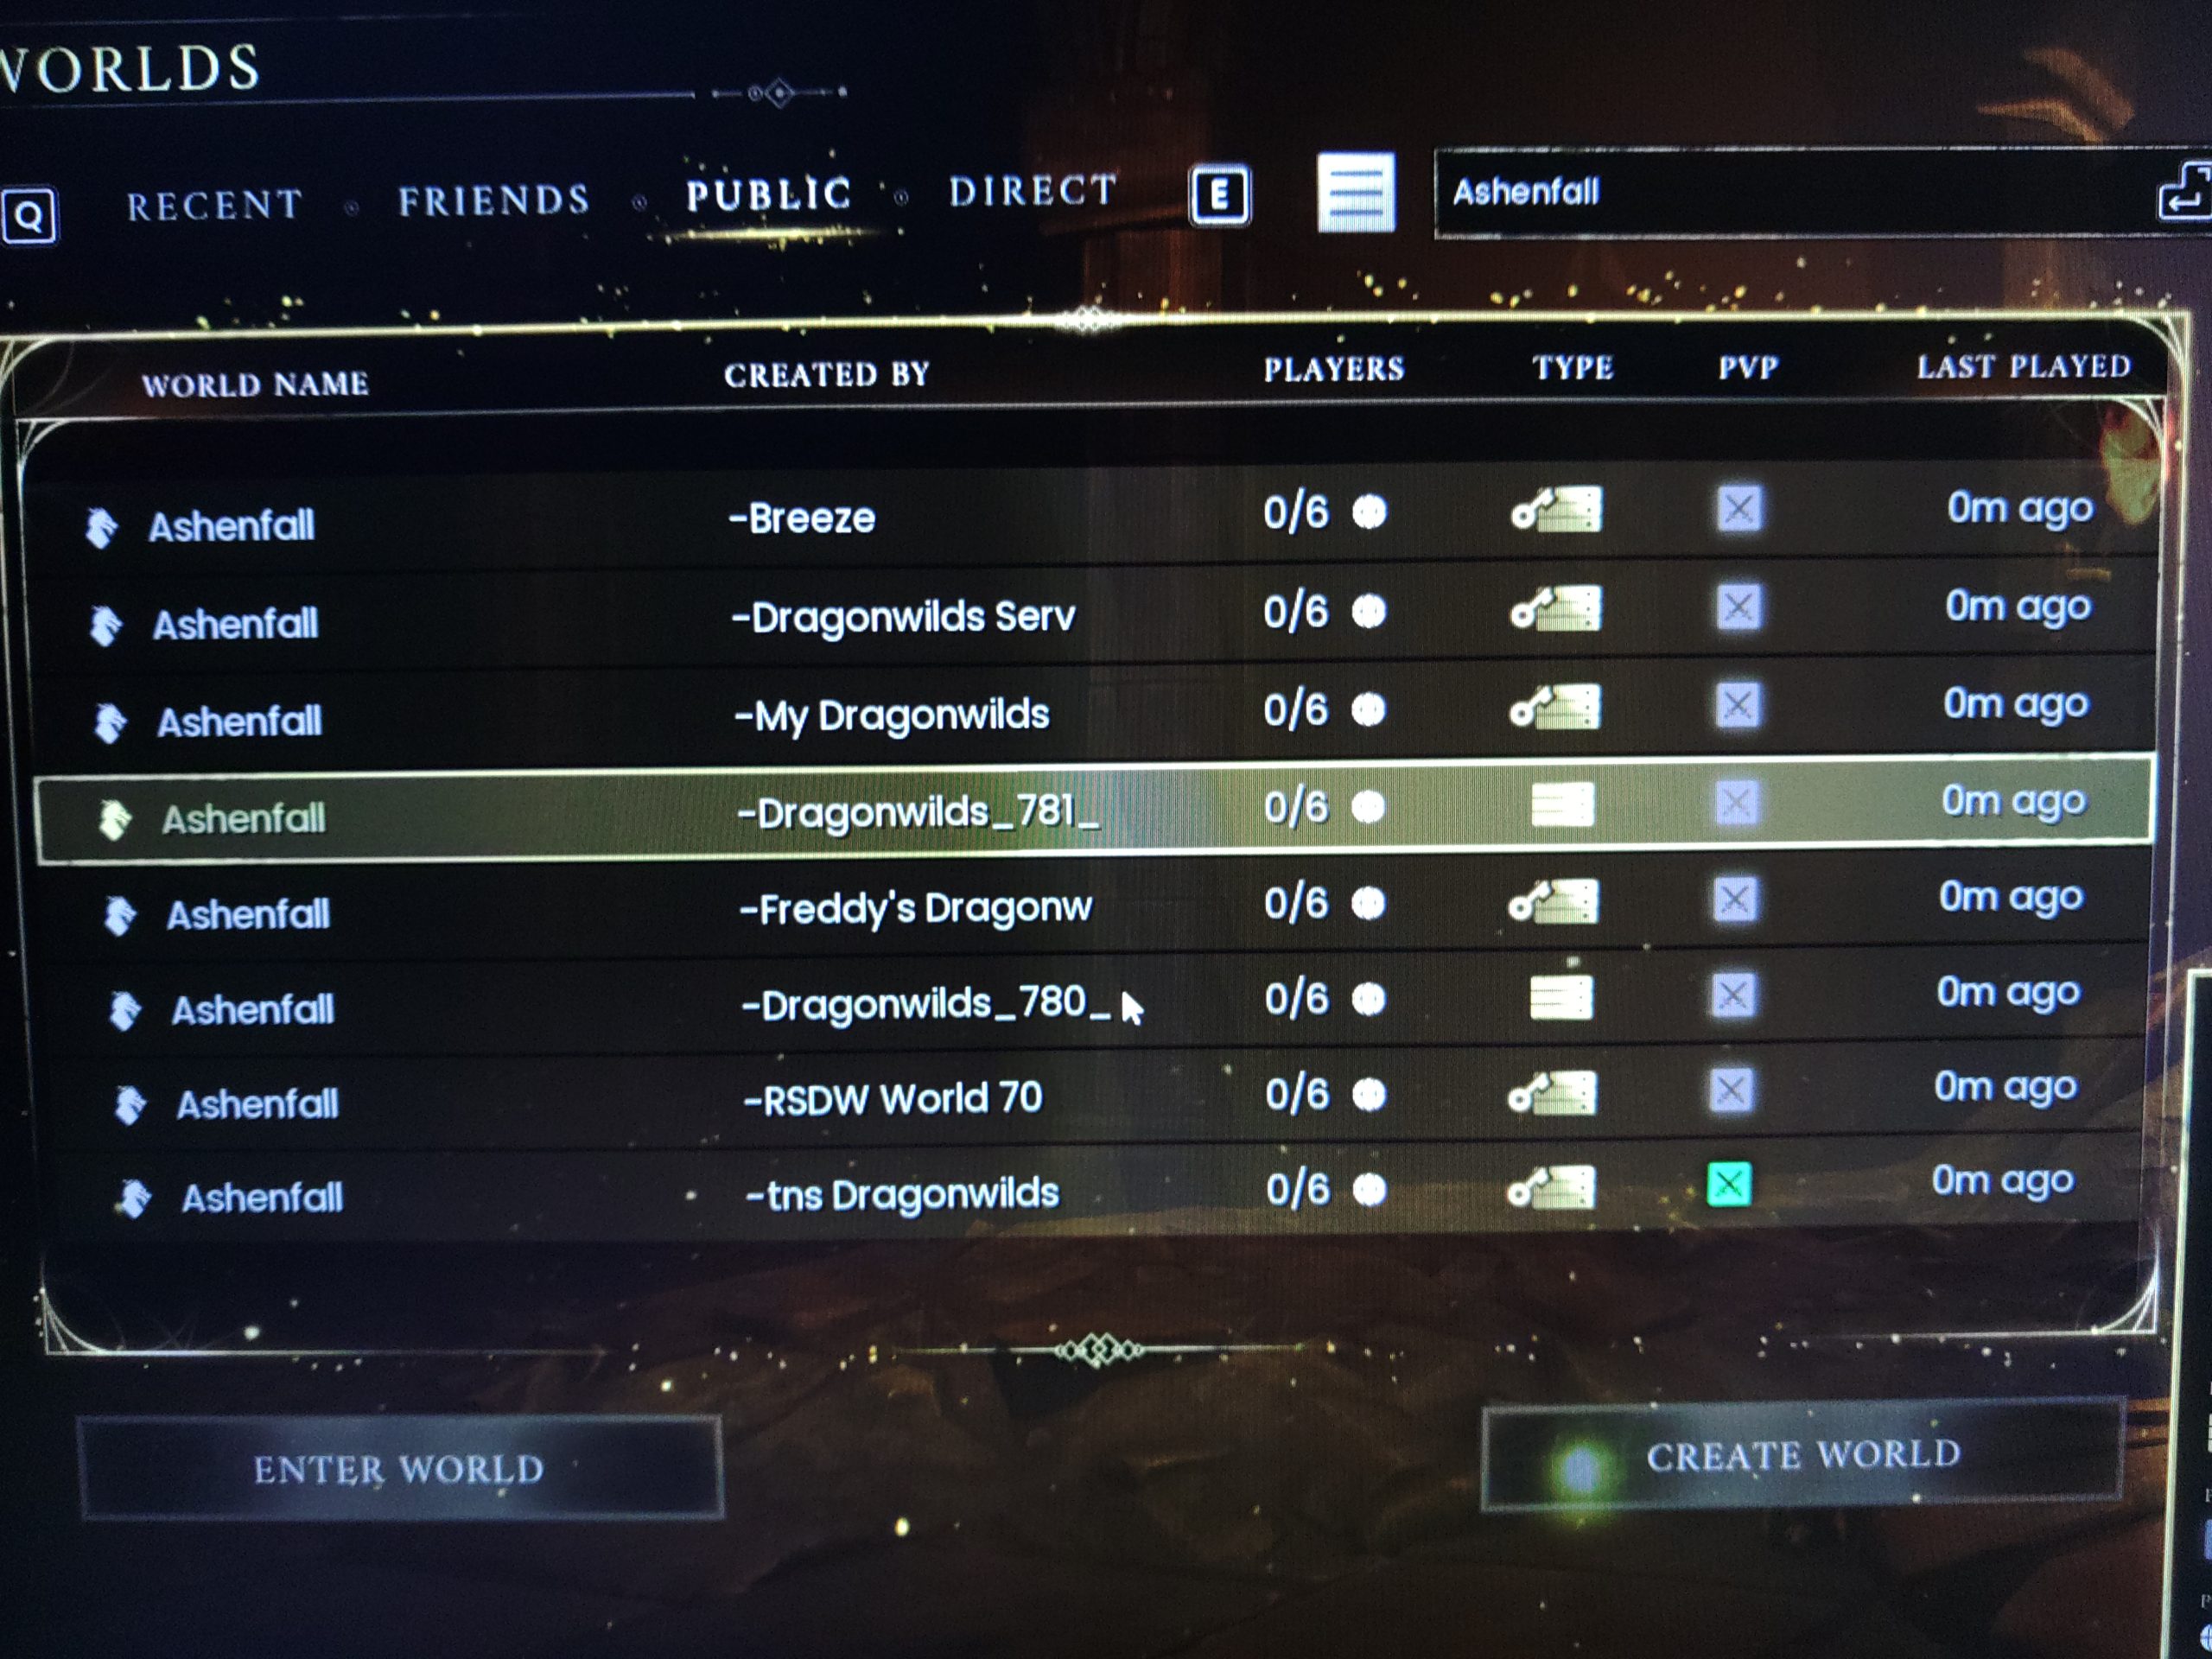
Enter your world name in the search box at the top right. Your world name is listed in the server setup notification email.
Your server will appear in the list with its name in the "CREATED BY" column. Select your target server.
Click ENTER WORLD to join.
World name search is case-sensitive. Enter the world name exactly as shown in your notification email. Since many servers retain the default name "Ashenfall," searching for "Ashenfall" will return many results. Searching for your unique world name ensures you find the correct server.
▲ Searching by world name in the PUBLIC tab displays the server name in the CREATED BY column
Method B: Direct Connection (IP Address)
You can also join directly by specifying your server's IP address and port number.
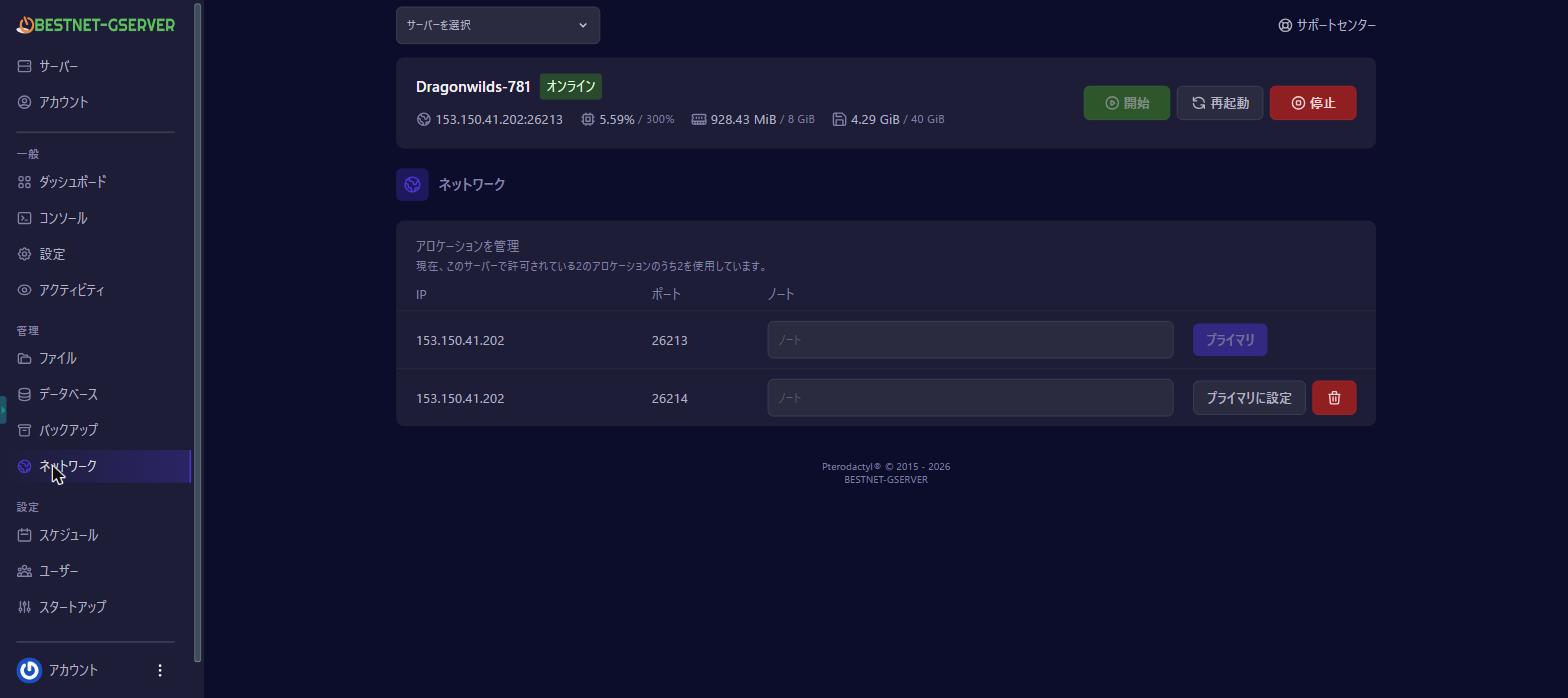
Open your server in the game panel and check the Network tab. The IP address:port number shown under "Primary Allocation" (e.g., 153.150.41.203:26213) is your server's connection address.
Open Worlds → DIRECT tab in-game.
Enter the IP address:port number and connect.
▲ Check the IP:port number in the Primary Allocation field of the Network tab
Port numbers vary depending on server availability at the time of construction. Always verify the current value shown in the Network tab.
Server Settings: Review and Customize (Optional)
Your server comes pre-configured with a unique world name and server name (listed in your notification email). Maximum concurrent players is determined by your service plan. You can optionally set the following passwords in the "Startup" tab of the game panel. Changes take effect after server restart.
World Password (Public / Private Toggle)
If you leave the World Password blank, your server will be public and anyone who finds it by world name can join. To prevent third-party access, set a password in the "World Password" field of the Startup tab. Share this password along with connection details to those you wish to invite.
Admin Password (Delegate Server Management)
If you share the Admin Password with a trusted teammate, that person gains in-game server management privileges. However, the server owner (Owner) retains top-level authority, including the ability to ban/unban offline players.
Troubleshooting Connection Issues
If you cannot join, check the following in order:
Is your Owner ID correctly set? The most common reason for connection failure is an unset or incorrectly pasted Owner ID. Verify in the Startup tab that the Player ID from Step 1 is entered correctly.
Did you restart the server after setting the Owner ID? Changes do not take effect until you restart.
Are you searching for the world name with exact case sensitivity? Enter the world name exactly as shown in your notification email.
Is your server status showing "Running" (green) in the game panel?
Has enough time passed since the server started? The server may take a few moments to appear in the public browser after startup.
If the issue persists, please contact support via a support ticket, including your world name and the IP:port number from the Network tab.
Currently, RuneScape: Dragonwilds servers support a maximum of 6 concurrent players (game limitation).
Next Steps
After completing initial setup, consider using the following resources as needed: