
- 7 Days to Die
- 1. Prerequisites
- 2. Revision History
- 3. When Importing Save Data
- 4. When Importing RWG Worlds
- 6. Mod Installation
- 7. How to Change Difficulty
- 8. How to Enable/Disable PvP/Friendly Fire on a 7 Days to Die Server
- 9. How to Delete Player Data
- 10. 7 Days to Die Server List Display Settings
- 11. How to Change the Server Name
- 12. How to Enable Cheats in 7 Days to Die
- 13. Entering Cheat Mode
- 13. How to Delete a Server World in 7 Days to Die
7 Days to Die
1. Prerequisites
Please log in to the Game Panel.
For information on how to log in to the Game Panel, please see here
2. Revision History
- 1.0:
- Created: 2024/1
- Update Details: Initial version created
- Created by: BESTNET-GSERVER
3. When Importing Save Data
You can import save data from your PC/home server or from servers of other game hosting providers.
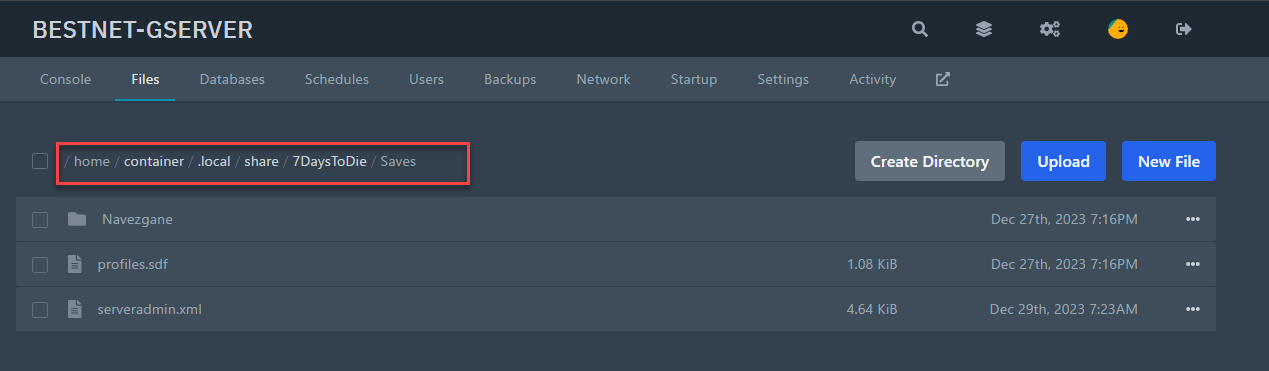
Upload all files in the Saves folder using the Game Panel’s server file manager or via FTP connection.
For information on how to connect via FTP, please see here
Below are important points to note.
1. The world name and save data must match. If they do not match, please edit serverconfig.xml to ensure they match and save.
2. For Windows, save data is located at %AppData%7DaysToDieSaves.
4. When Importing RWG Worlds
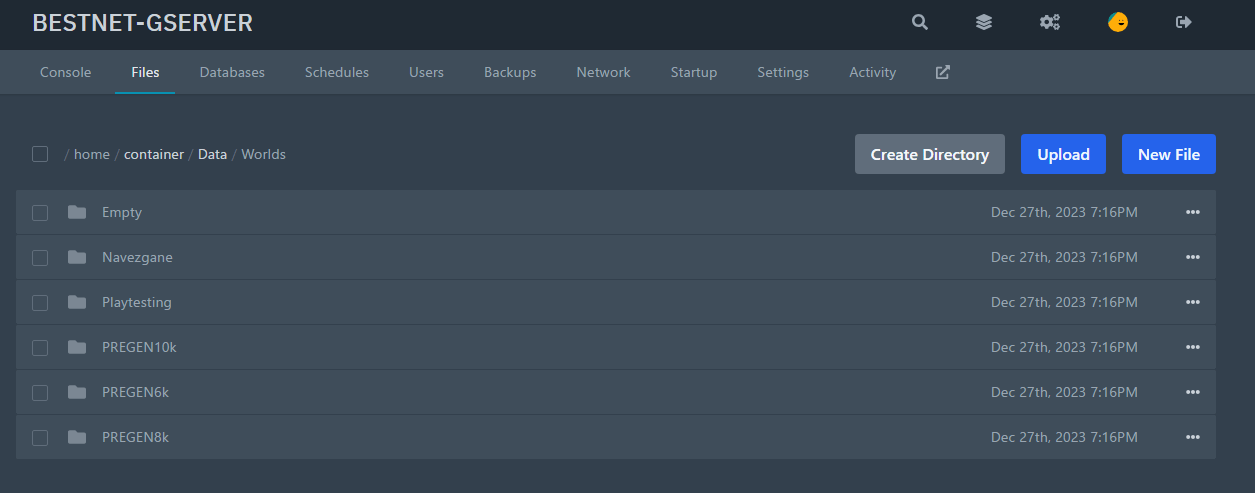
Upload to home/container/Data/Worlds using the Game Panel’s file manager or FTP connection.
※If uploading via the file manager, compress the folder before uploading, then extract it through the file manager.※
5. Editing serverconfig.xml
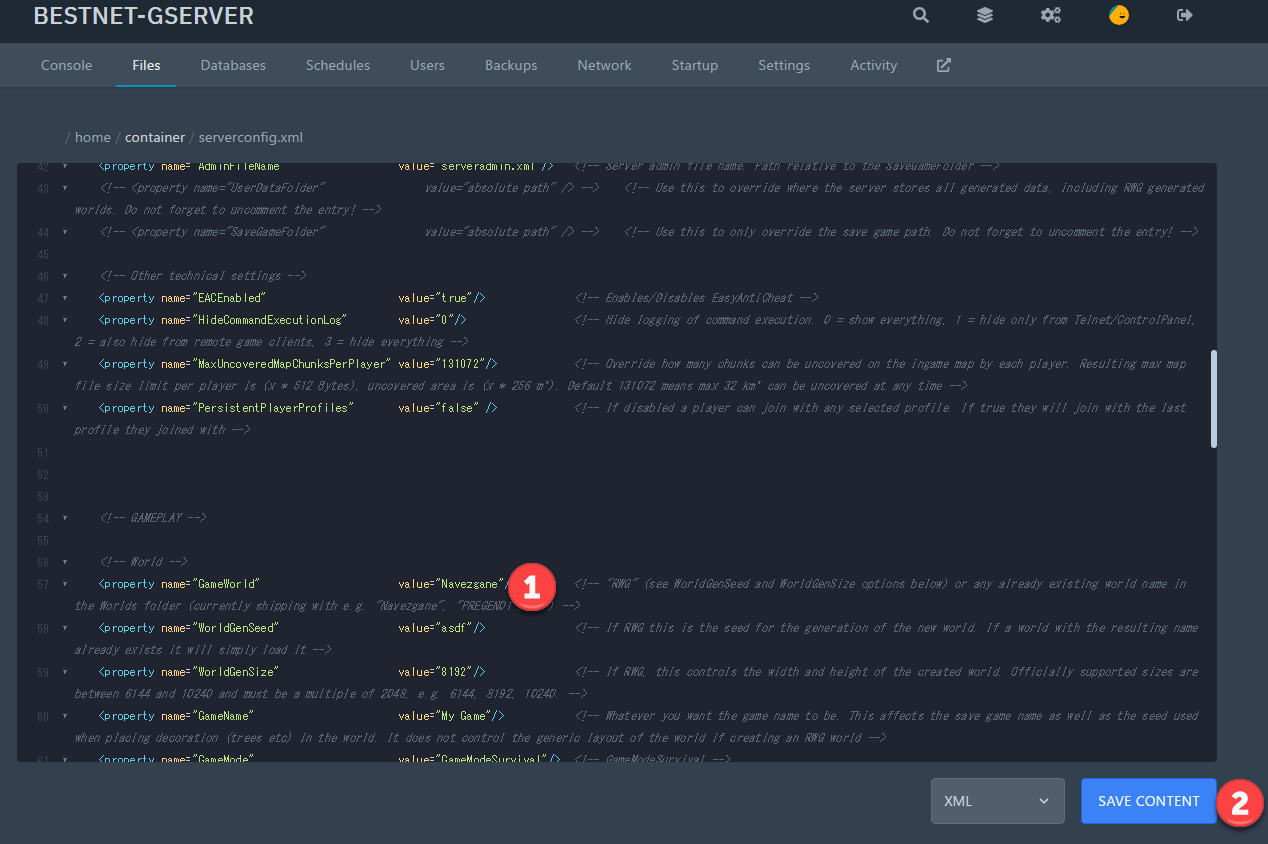
Open the serverconfig.xml file in the root directory, change the game world name to your world name, and click save.
If you are unsure where your world data is located on your PC, it is in %AppData%7DaysToDieGeneratedWorlds.
Below is a reference image.
6. Mod Installation
To install mods, upload the desired mod files to the Mods folder using the file manager.
Each mod is contained in its own folder, which includes a ModInfo.xml file.
7. How to Change Difficulty
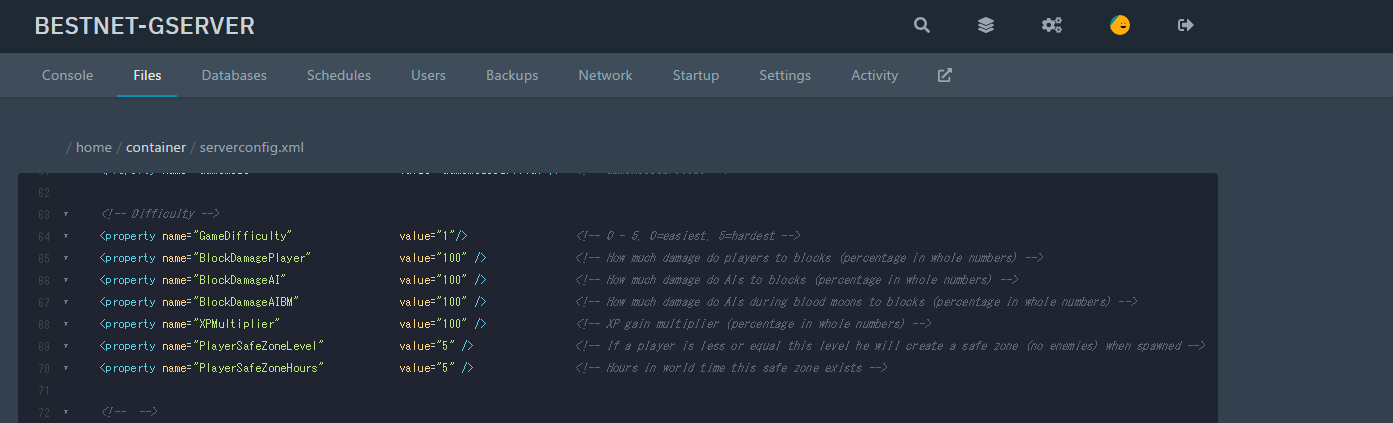
Most customization of 7 Days to Die servers is done in the serverconfig.xml file. Difficulty changes are included in this. Below are five difficulty levels with descriptions of their differences.
(0) Scavenger = Easiest; the easiest setting for beginners
(1) Adventurer = Easy; slightly more challenging than the easiest level
(2) Nomad = Normal; designed for players with FPS game experience
(3) Warrior = Hard; even more challenging than normal mode
(4) Survivalist = Harder; a more difficult setting
(5) Insane = Hardest; the most difficult difficulty level
8. How to Enable/Disable PvP/Friendly Fire on a 7 Days to Die Server
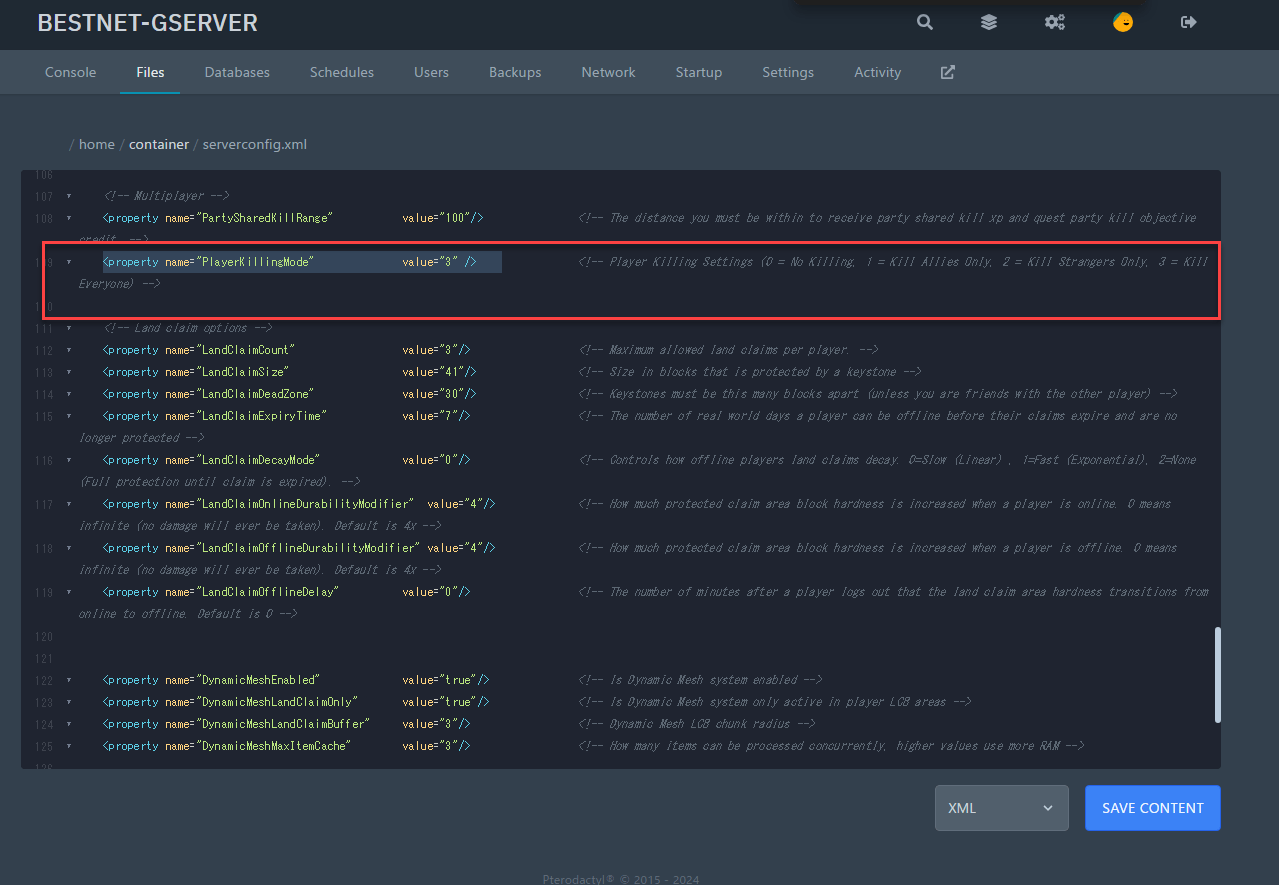
When running a 7 Days to Die server, if you want to change rules regarding PvP and/or friendly fire, you can modify the settings in serverconfig.xml.
Parameter name: PlayerKillingMode
The meanings of each value are as follows:
0 = No PvP; Players cannot damage each other under any circumstances.
1 = PvP with allies only; Players can damage each other only if they add each other to their allies list using the in-game player menu and both agree.
2 = PvP with strangers only; Players can damage each other unless they are allies.
3 = PvP with anyone; Players can damage anyone regardless of whether they are allies.
9. How to Delete Player Data
If player data becomes corrupted for any reason, that player will be unable to log in to the server.
In such cases, you will need to delete the player data.
Player data names are based on Steam64ID, so you will need to identify the Steam64ID of the player you wish to delete.
There are various methods to identify the ID, and if you are unsure, there are many bloggers who explain this, so please search the internet for the identification method.
Player data is typically located in the following directory:
/Saves/Navezgane/world
If you are using a map other than the default, the world folder will be under the name of the map you are using.
10. 7 Days to Die Server List Display Settings
7 Days to Die has five settings that allow you to change how your server appears in the server list.
11. How to Change the Server Name
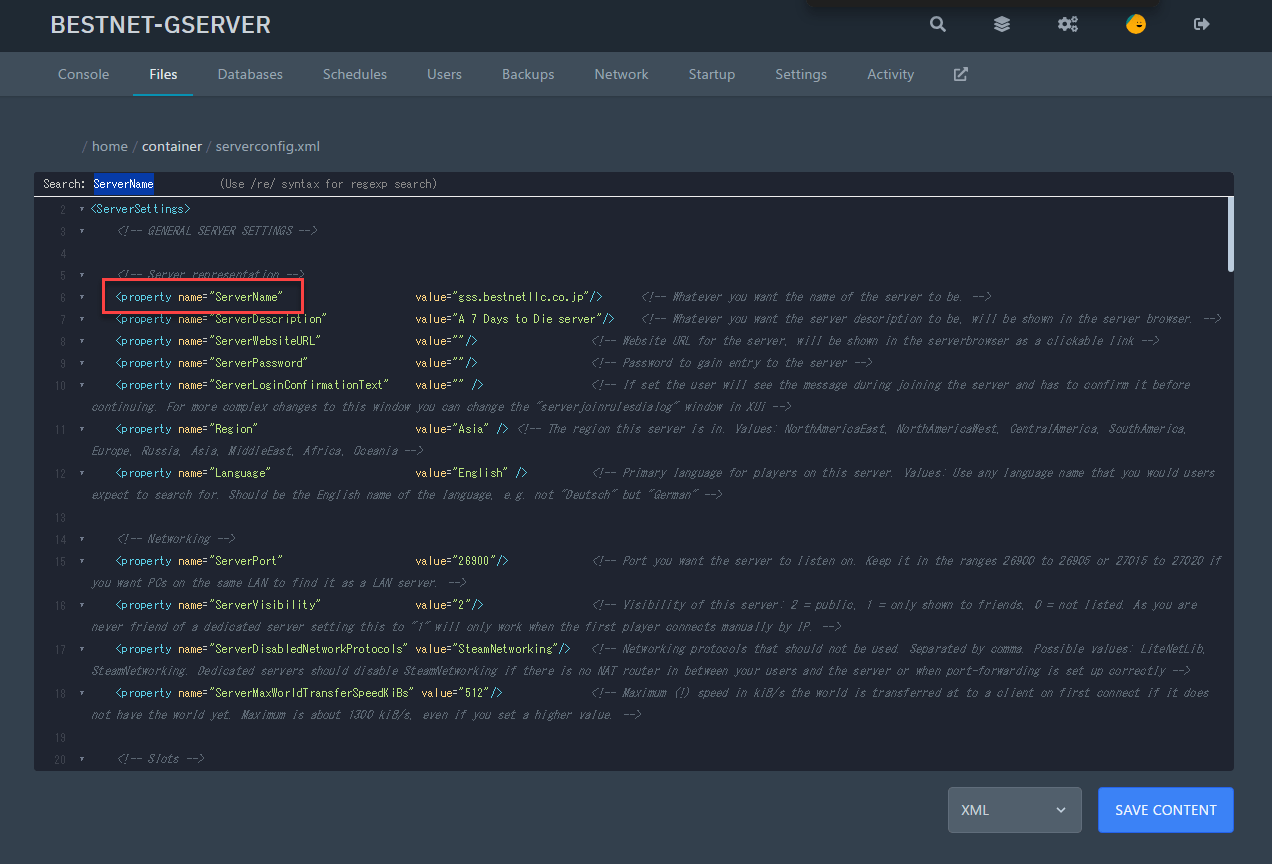
Log in to our Game Panel and open serverconfig.xml with the file manager.
Press ctrl+f to search for each of the following parameters you wish to change:
ServerName #This parameter changes the server name in both the in-game browser and Steam server viewer. You can set this to anything you prefer.
ServerDescription #Provides a brief description displayed first when clicking on the server in the server browser.
ServerWebsiteURL #Allows you to add a clickable website URL link below the server description.
ServerPassword #Allows you to add a password to the server to prevent random people from joining.
ServerLoginConfirmationText #Allows you to create a message box that appears just before a player loads the server world.
After making changes, click the SAVE CONTENT button.
12. How to Enable Cheats in 7 Days to Die
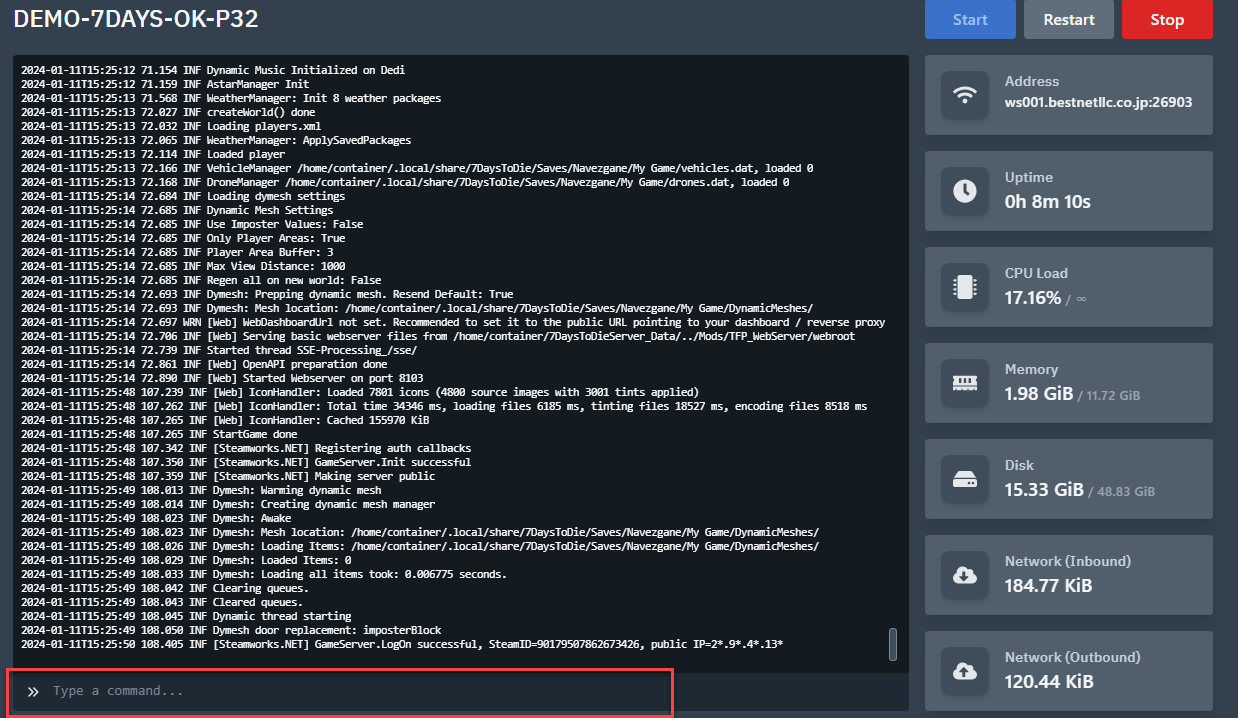
To enter cheat mode, you must first add yourself or another user as an admin to the server using your SteamID64/Entity ID/Username.
Below is the command reference:
admin add name/entity id/steam id permission level
Example: admin add Steam_76561197965969909 0
The number at the end of the command determines the user’s permission level, with 0 being the highest permission level.
Commands can be entered from the console in the Game Panel.
13. Entering Cheat Mode
To enter cheat mode in-game, press the F1 key.
There are various commands available, allowing you to fly and teleport.
Please search the internet for command lists.
13. How to Delete a Server World in 7 Days to Die
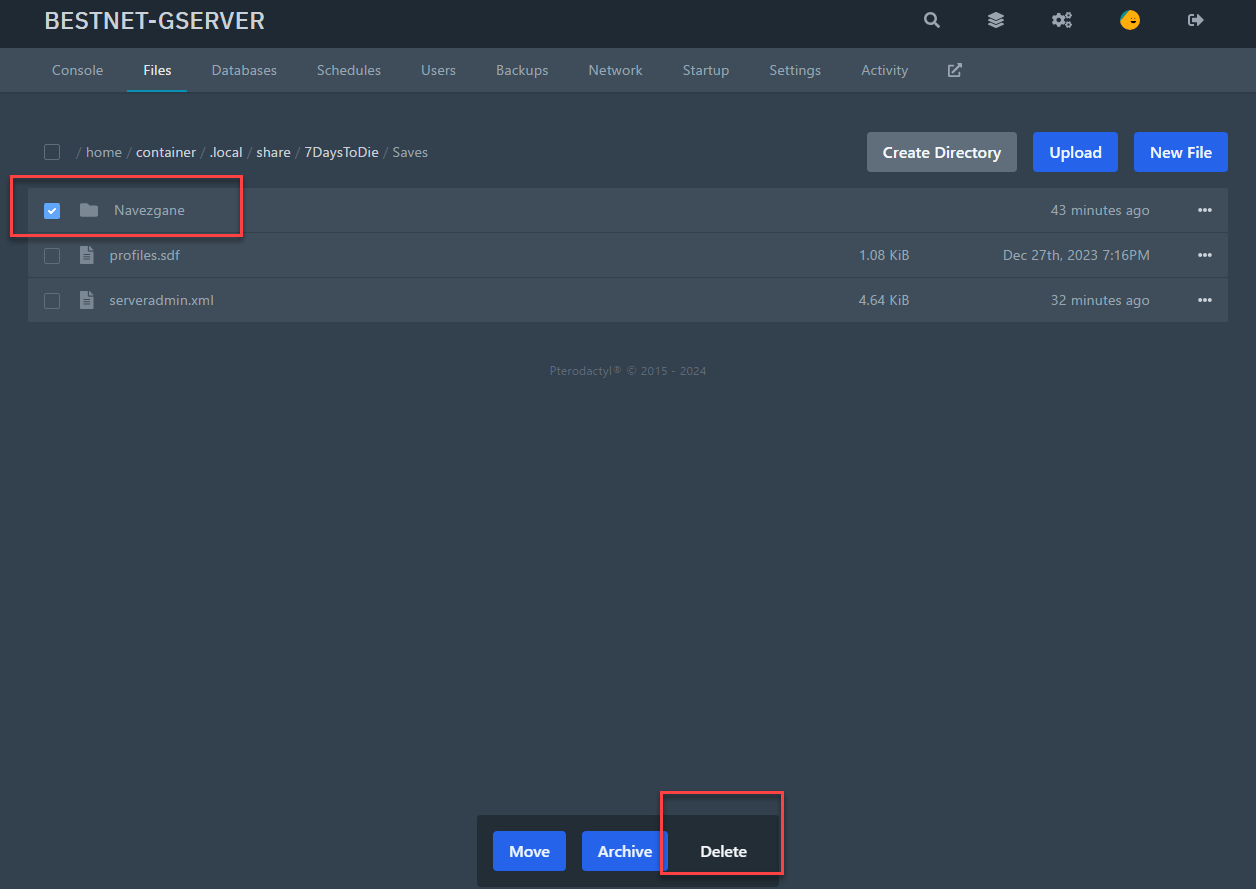
If you want to create a new world with the same name or no longer plan to use a world and want to delete it, you can delete the world by following these steps.
In the example image below, we are deleting “Navezgane,” which is the default map.
Check the map you wish to delete and click the Delete button.
If you still want to use it, instead of deleting it, you can slightly change its name or take other measures so that the game engine does not load the unused map.
Example: Navezgane_old
If you have any further questions, please submit a ticket.