
This guide explains the procedures and important considerations for canceling your game server service. All data on the server will be deleted immediately upon cancellation completion, so please be sure to back up any necessary data in advance.
Important Information
Essential Checklist Before Cancellation
Before proceeding with cancellation, you must complete the following:
- Obtain a full backup using the “Backup” feature in the game panel
- Download the created backup file to your local environment
- Download important files such as save data individually (optional)
- Verify that downloaded files are not corrupted
Cancellation Types and Refunds
You may choose one of the following cancellation methods:
Immediate Cancellation
The game server instance will be immediately deleted at the time you submit your cancellation request through the client portal.
Refund
We will refund the unused period as account credit. This credit can be applied to other services provided by us.
Cancellation at End of Billing Period
You may continue using the server normally until the end of the current billing period, at which point the service will automatically terminate.
Refund
None. The billed period will be used in full.
Revision History
- v2.0 — May 29, 2026
- Added precautions before cancellation, updated procedure screenshots, clarified refund provisions. BESTNET LLC
- v1.0 — January 2024
- Initial version created. BESTNET LLC
Cancellation Procedure
After completing the above essential checklist, proceed with cancellation following these steps:
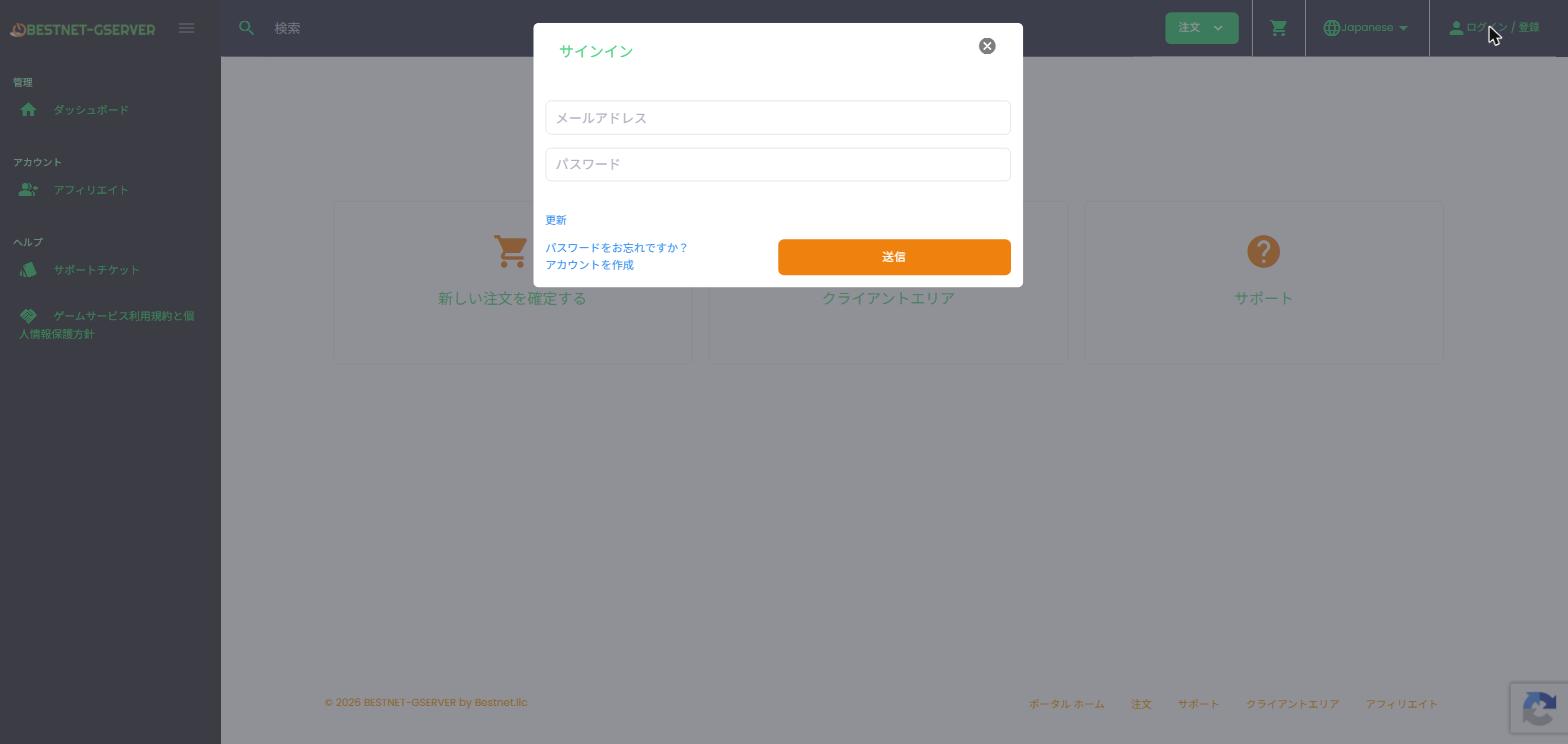
STEP 1: Log in to the Client Portal
Access the Client Portal and log in with your registered email address and password.
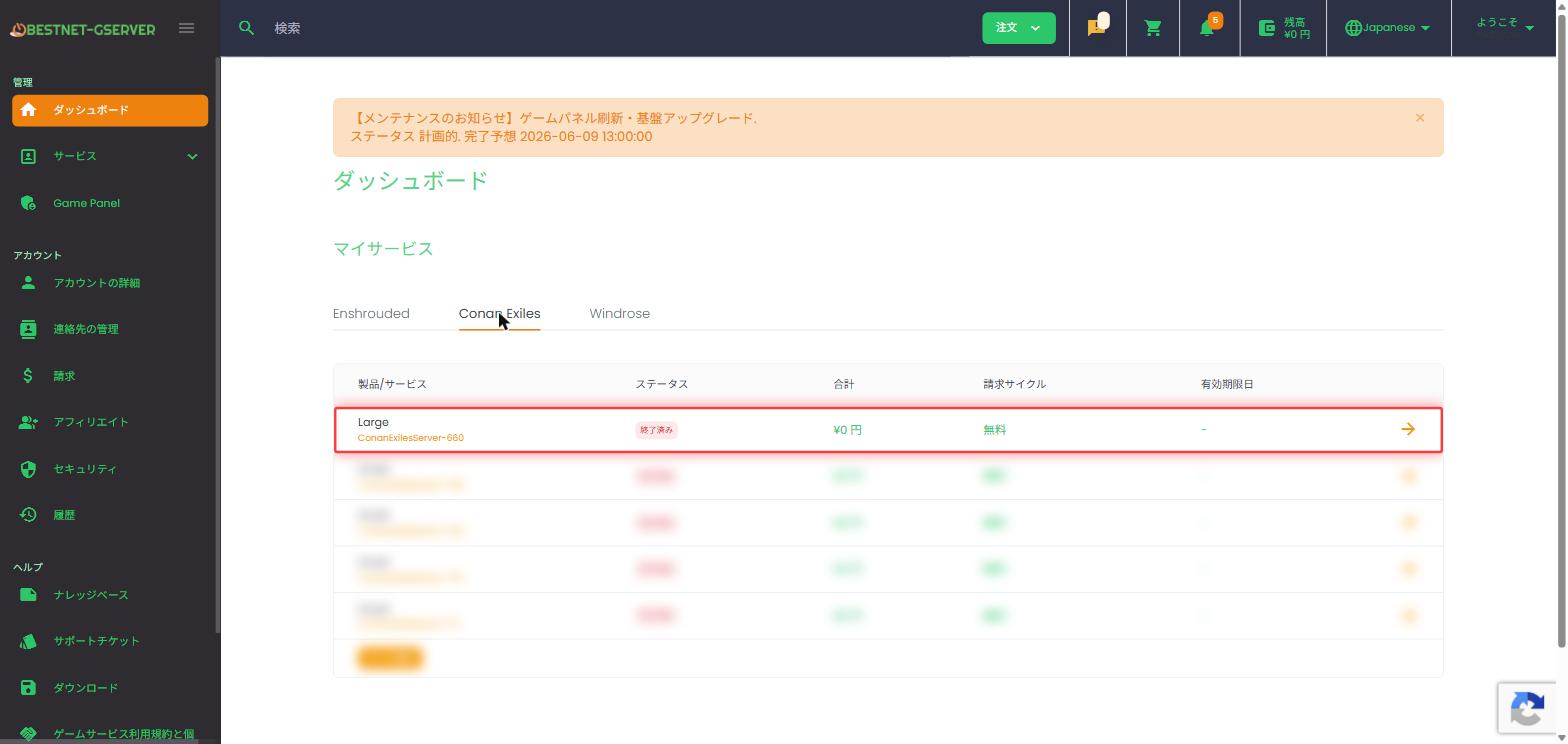
STEP 2: Select the Service to Cancel from the Service List
After logging in, click “Services” from the top menu or dashboard to display the service list. Click the service you wish to cancel.
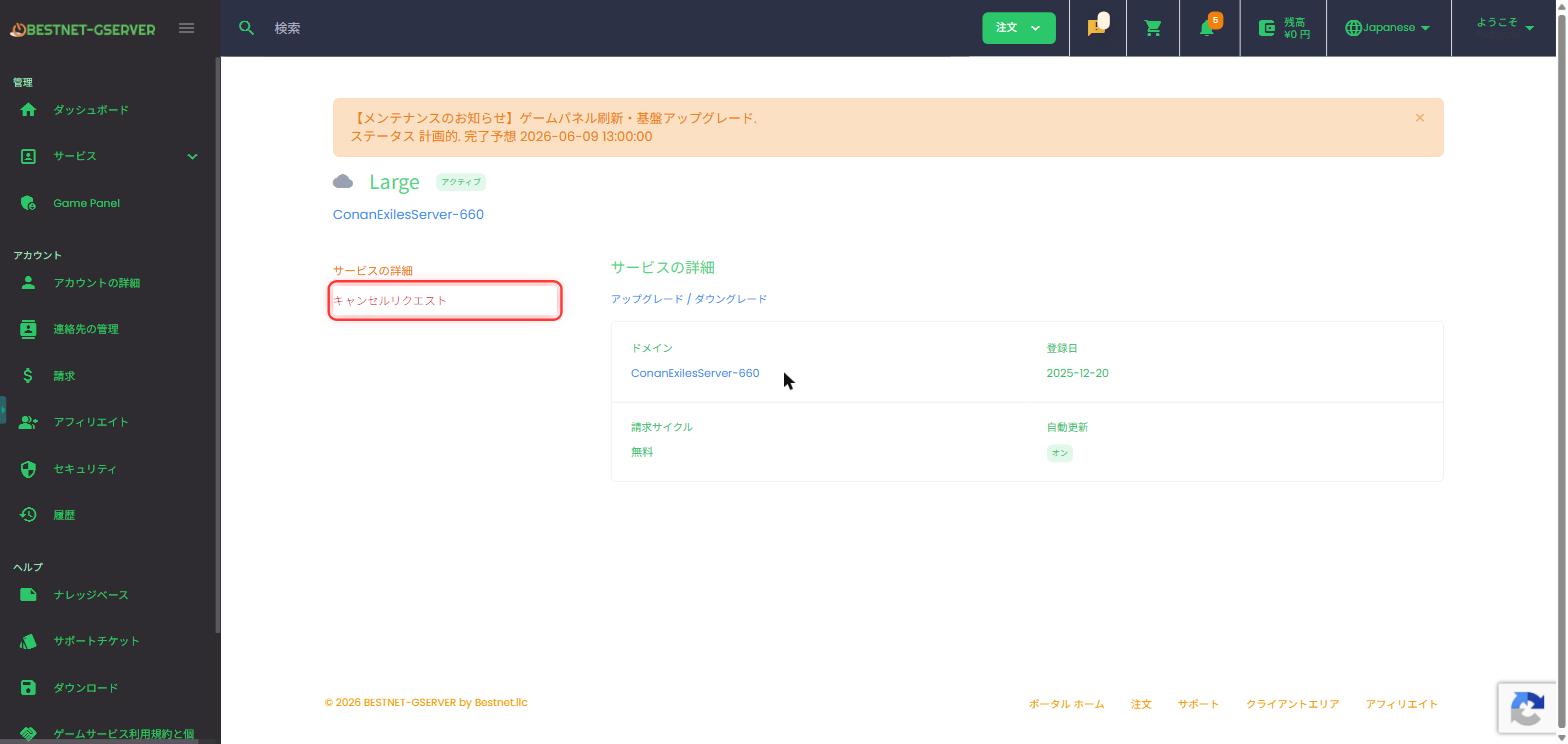
STEP 3: Click “Cancellation Request”
From the menu on the service details screen, select “Cancellation Request”.
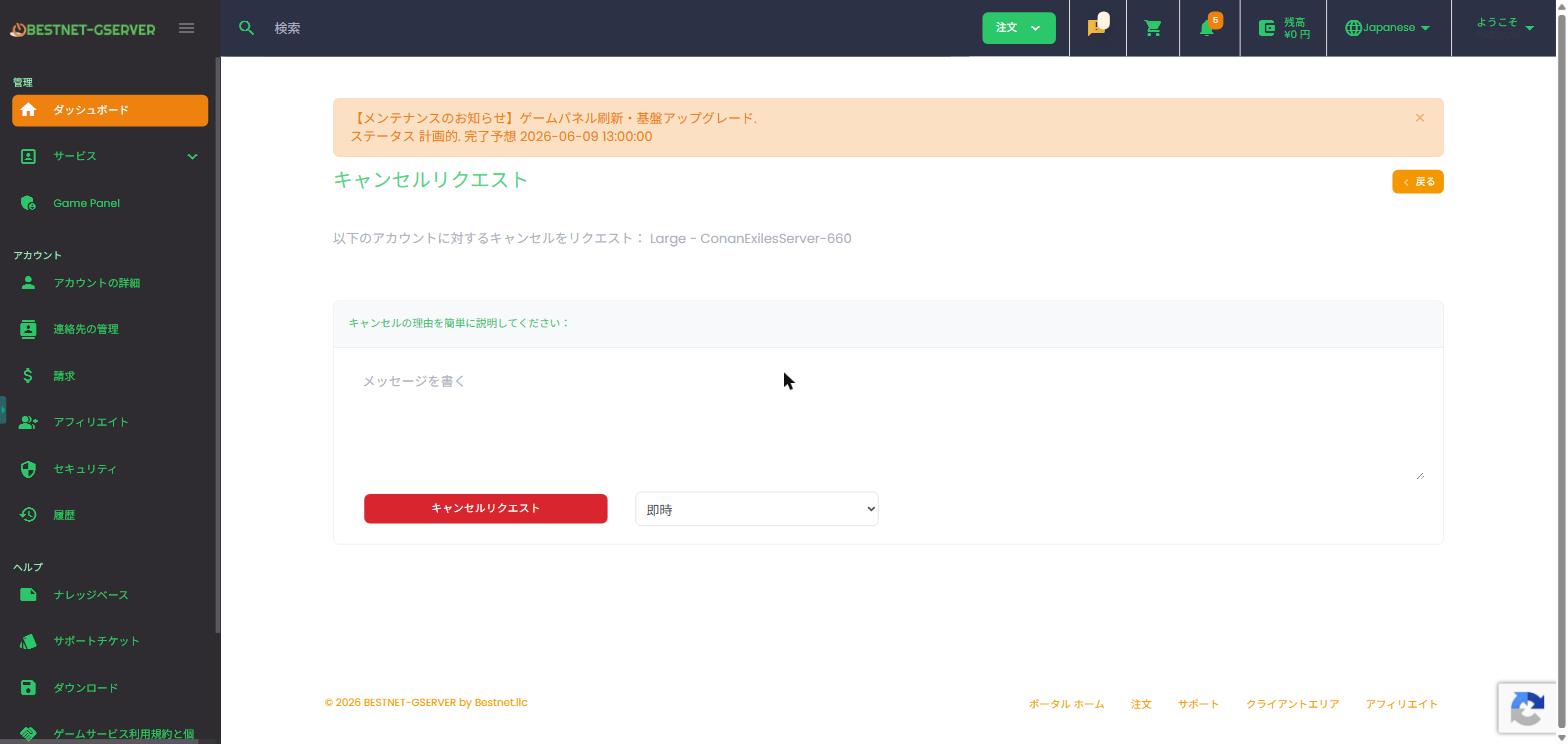
STEP 4: Select Cancellation Type and Enter Reason
Select your cancellation type (immediate or at end of billing period) and briefly enter your cancellation reason.
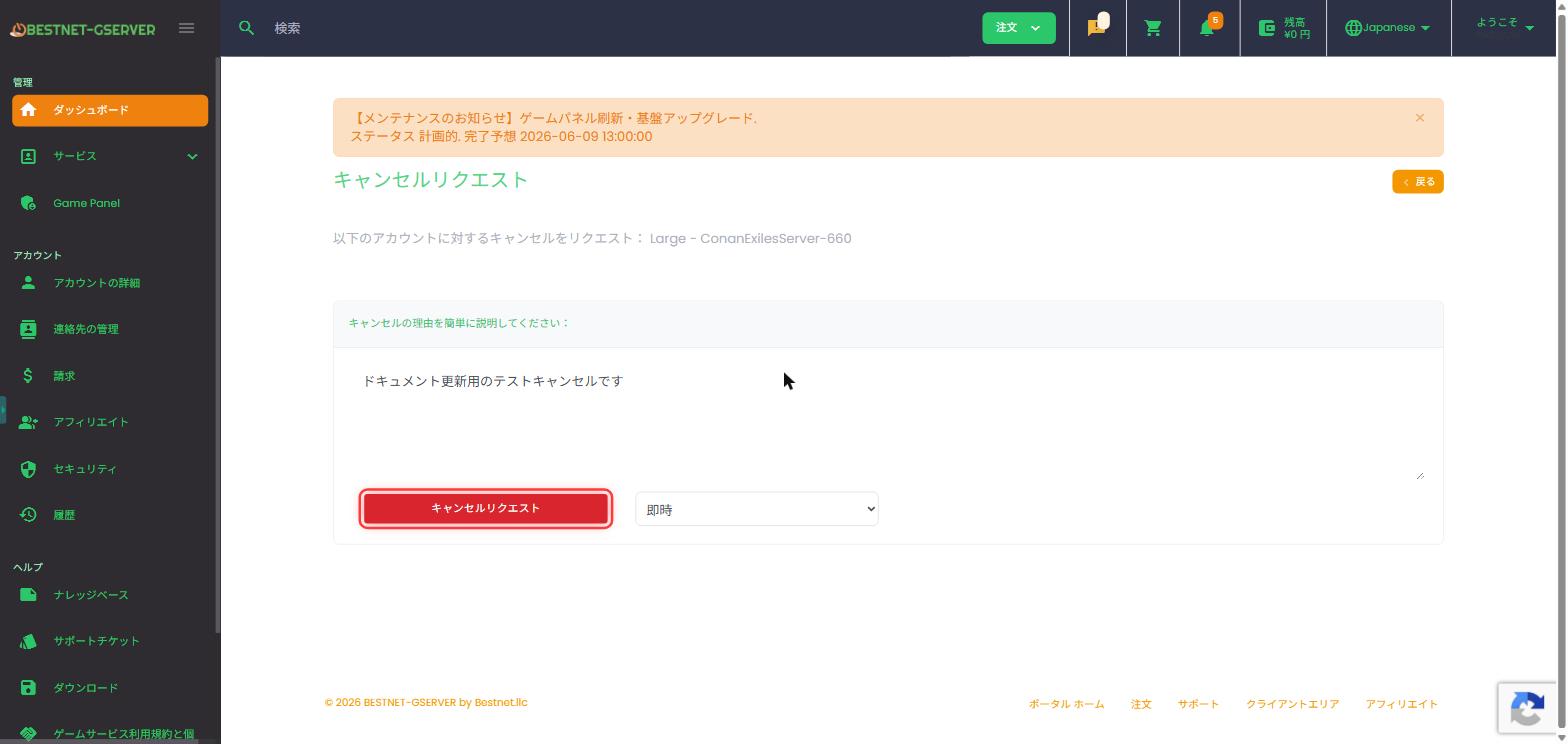
STEP 5: Submit the “Cancellation Request” Button
After confirming your input, click the “Cancellation Request” button to submit your request.
STEP 6: Confirm Cancellation Completion
Return to the service list and verify that the status of the target service shows “Cancelled” or that it no longer appears in the list.
After Cancellation
The following will be automatically executed after cancellation is complete:
- Immediate deletion of server instance
- Complete removal of related data (server, files, configuration, panel-side backups, etc.)
- Sending of cancellation completion notification email (to your registered email address)
- Granting of account credit if applicable (for immediate cancellation)