
Basic Usage
The BESTNET Game Server Panel features functionality that allows you to easily select and install plugins for your Minecraft JAVA server.
STEP1. Open Your Server Page
Open the server page for the server where you want to install plugins. The server can be running during plugin installation, but a server restart is required to apply the plugin.
STEP2. Click the Plugin Button
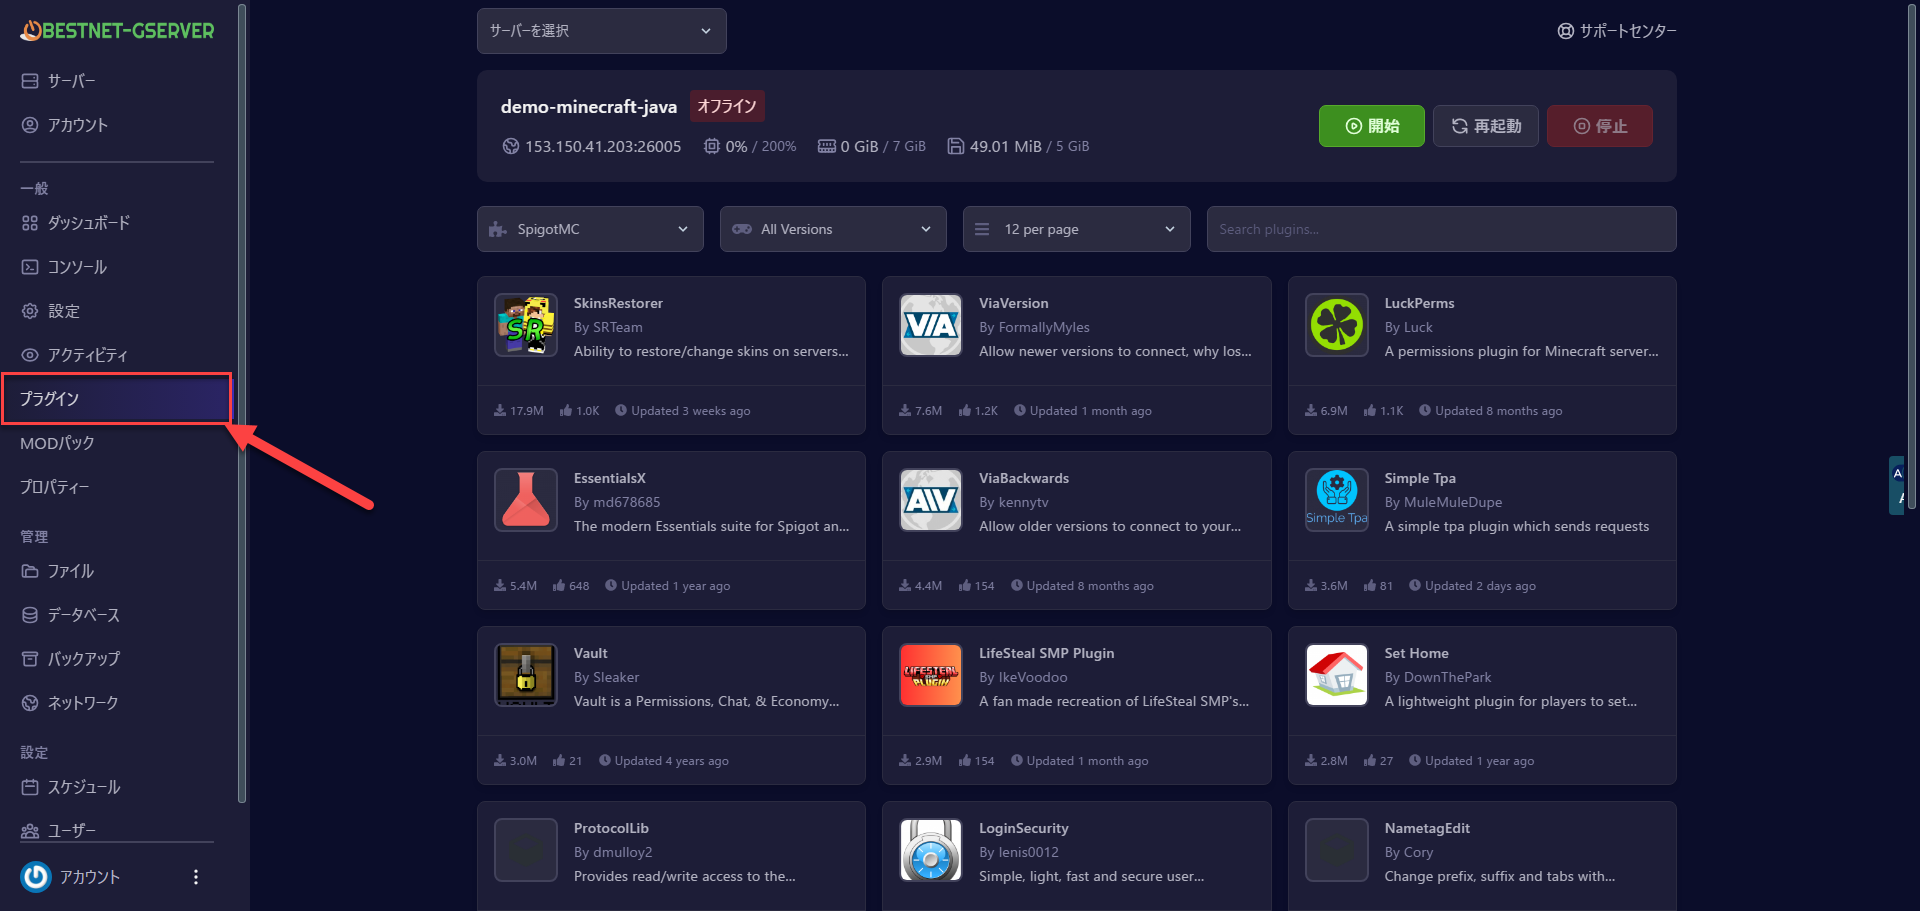
STEP3. Search for Plugins
Enter the name or keyword of the plugin you want to install in the search bar and execute the search. As an example, let’s search for “WorldGuard,” a popular protection plugin.
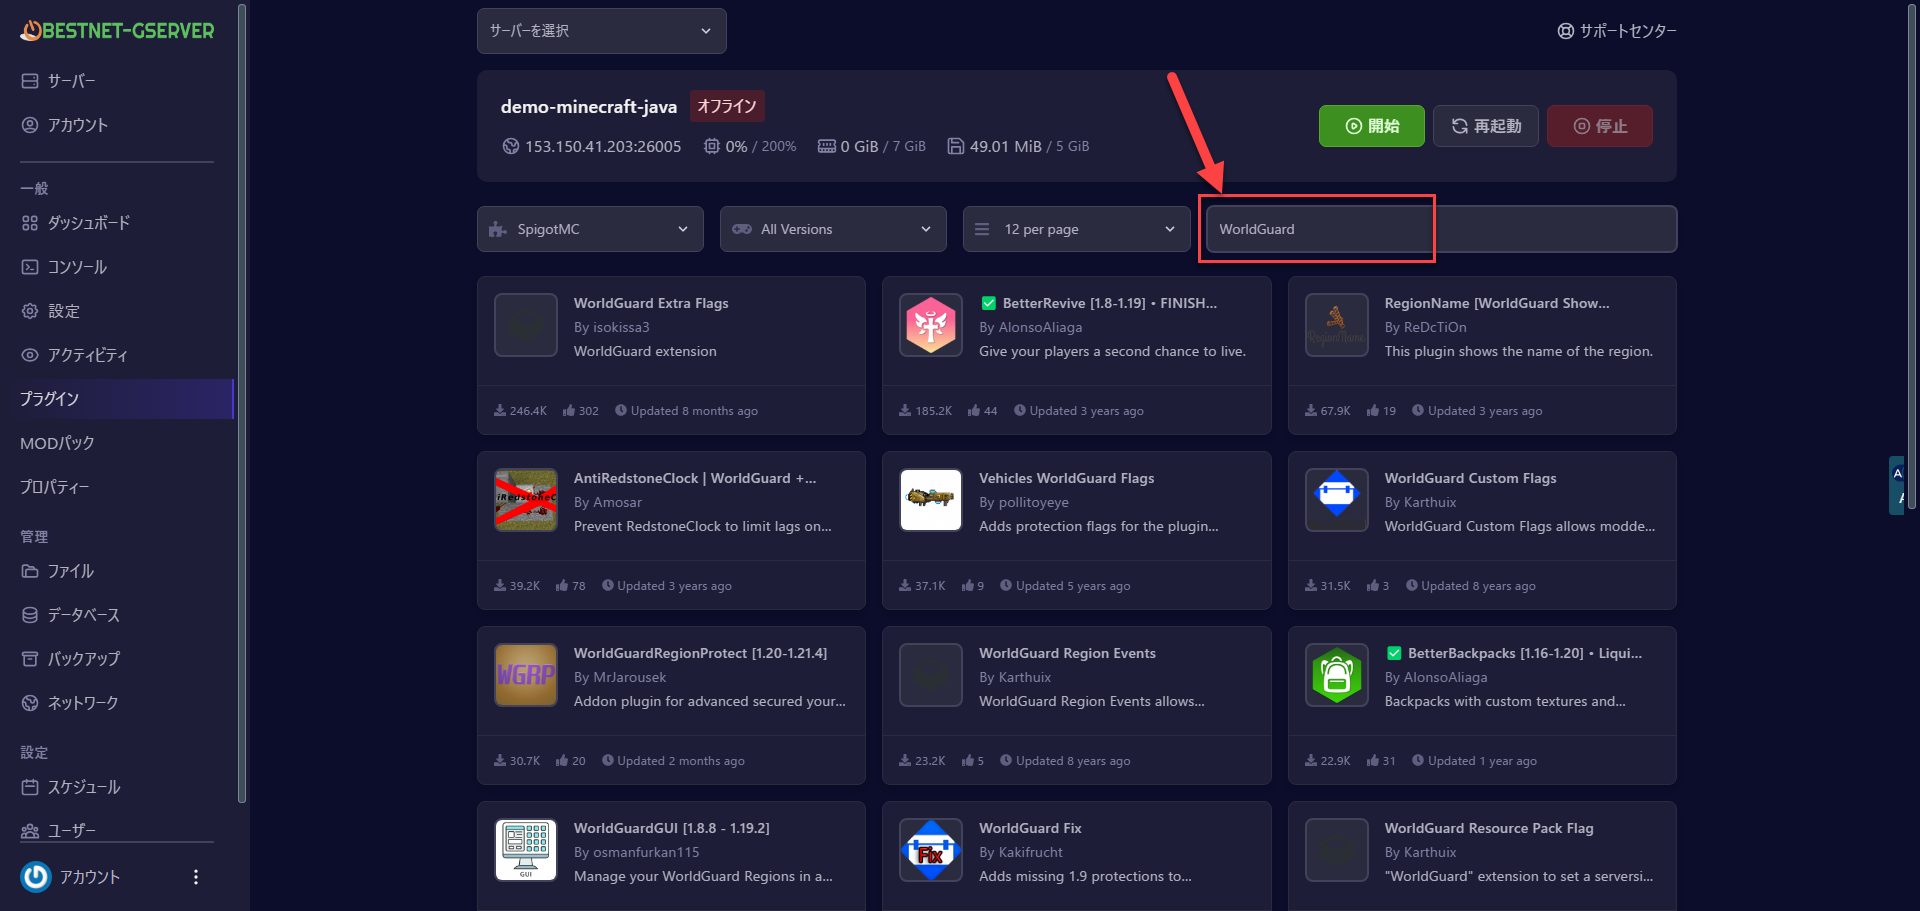
STEP4. Select a Plugin
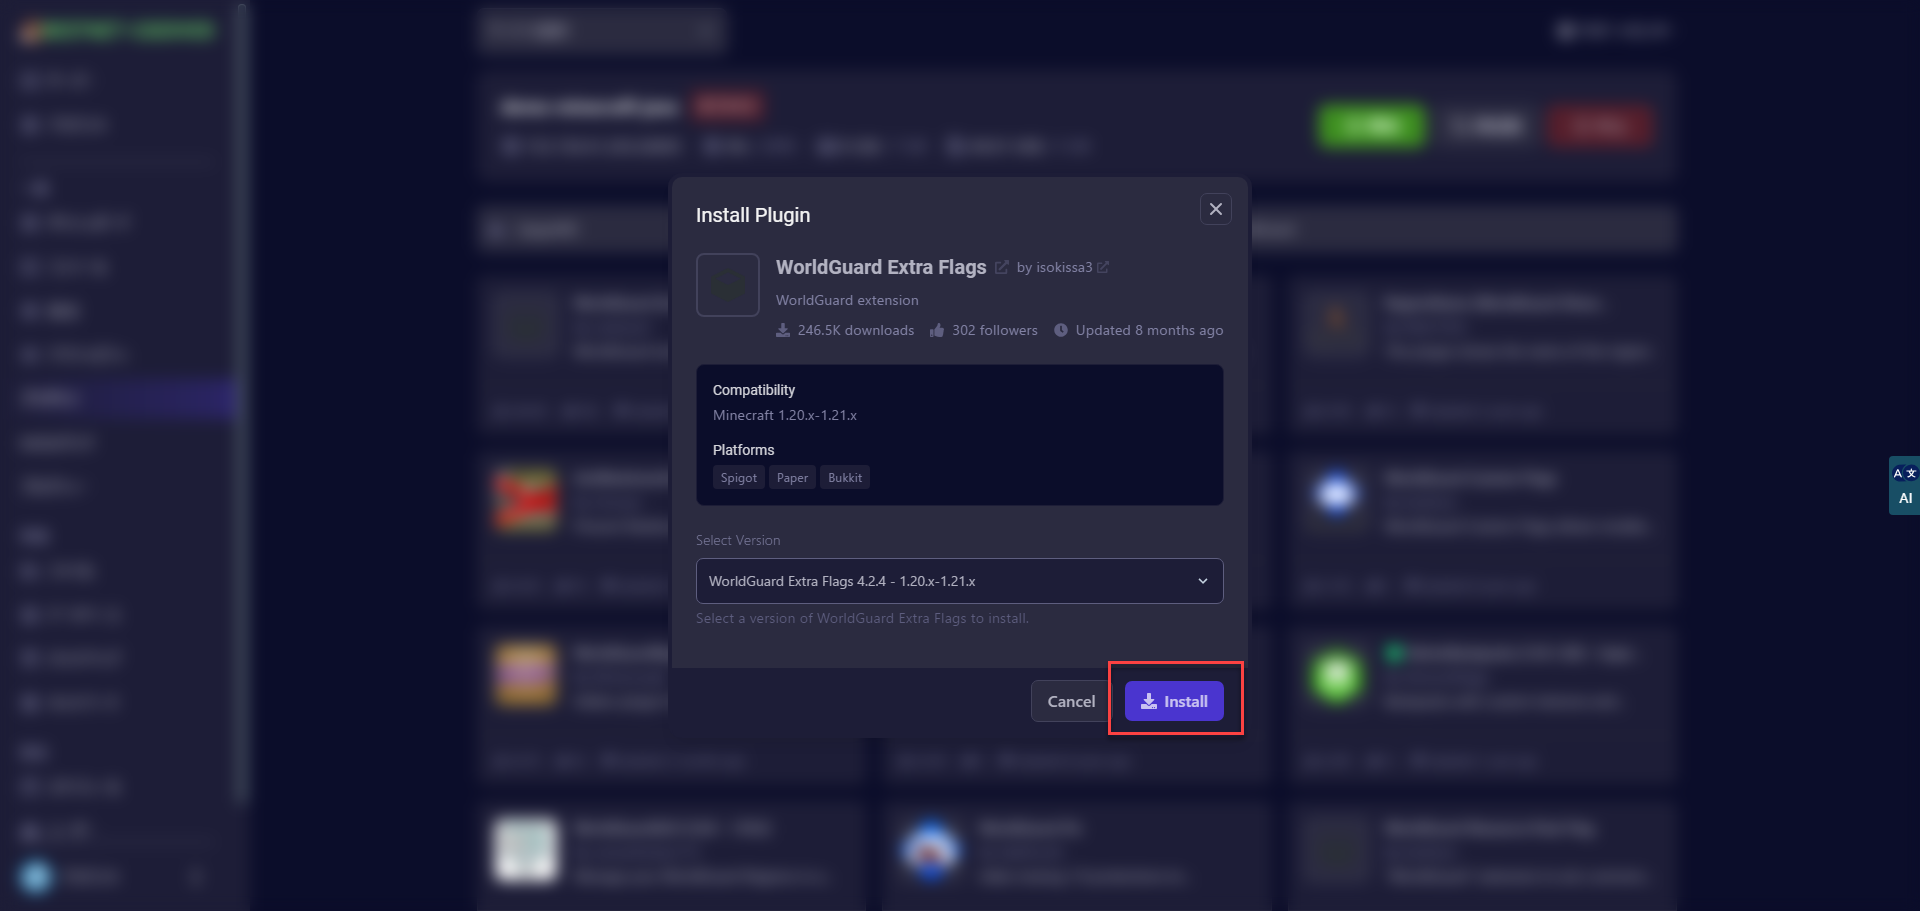
When you find the plugin you want to install, select it. Clicking on a plugin displays detailed information and available version options. Your server’s Minecraft version and the plugin’s compatible versions are automatically cross-referenced, so only compatible versions can be selected.
Use filter and sort features as needed to narrow down your desired plugin.
STEP5. Execute Installation
After selecting the plugin and deciding on a version, click the “Install” button. If a confirmation message appears, please accept it. The system will then automatically download the plugin file from Modrinth or SpigotMC and place it in your server’s plugins folder.
Since the download source is the official site, it is safe. Progress is displayed during processing, and when complete, you will see a message such as “Installation Successful.”
STEP6. Restart Your Server
After plugin installation is complete, restart your Minecraft server. The restart loads the newly added plugin and makes it available for use. Open the console on the panel and stop the server with the stop command, then restart with start, or use the restart button on the panel.